How to Make Fire Cider
So, you're keen to brew up some fire cider? This is the Best Fire Cider Recipe in Australia (well I think so!).
The Best Fire Cider Recipe in Australia (well I think so!)
So, you're keen to brew up some fire cider? It's a heck of a tonic, especially as we head into the cooler months here in Australia. This drink is like when then sun hits your eyes all of a sudden, and how they water and it leaves you splay-handed and blind? That’s this drink, in a jar! It packs a real punch but in the best way for your health.
Now, you might be scratching your head wondering, "Fire cider? What kind of pagan witchery is that?" Well, put simply, it's a potent infusion of invigorating ingredients steeped in apple cider vinegar. It’s been used for yonks as a traditional remedy, and for good reason. This stuff is a wonder for your immune system.
As the days shorten and a bit of a chill creeps into the air, our bodies can sometimes use a little extra support. Instead of reaching for something mass-produced, why not whip up a batch of fire cider? It’s surprisingly easy, and you can tailor it to your own tastes and what you've got growing in your backyard or can snag at your local farmers' market.
This recipe is a great starting point, and don't be shy about adding your own twist (I certainly have amended this over the years). Try adding some native ingredients if you're feeling adventurous!
Susanne's Fire Cider Brew
Yields: About 1 litre
Prep time: 20 minutes
Steeping time: 4-6 weeks
Ingredients:
1 litre of good quality apple cider vinegar (with the 'mother' if possible – it's full of goodness!)
1 large brown onion, roughly chopped
6-8 cloves of garlic, roughly chopped
1 (about 5cm) piece of fresh ginger root, grated or finely chopped
A few slices of fresh turmeric root (adds colour and anti-inflammatory properties)
1 (about 5cm) piece of fresh horseradish root, grated (be careful, this stuff is potent!)
2-3 red chillies, roughly chopped (adjust to your spice preference)
1 lemon, sliced (including the peel, just give it a good wash)
1 orange, sliced (again, don’t get a grot, wash it well)
2 tablespoons of fresh rosemary leaves
2 tablespoons of fresh thyme leaves
1 teaspoon of whole black peppercorns
Local raw honey, to taste (add after steeping)
Optional Aussie additions:
A pinch of lemon myrtle leaves (adds a beautiful citrusy aroma)
A few Kakadu plum pieces (for a Vitamin C boost and unique flavour – use sparingly as they are powerful)
Equipment:
1.5 litre glass jar with a tight-fitting lid
Cheesecloth or muslin cloth
Fine-mesh sieve
Dark glass bottles for storing your finished fire cider
Let's Get Brewing!
Prep Your Ingredients: Wash and chop all your fresh ingredients. Don't worry about making them too fine; the vinegar will do its job extracting all the good stuff. Think rustic and chunky!
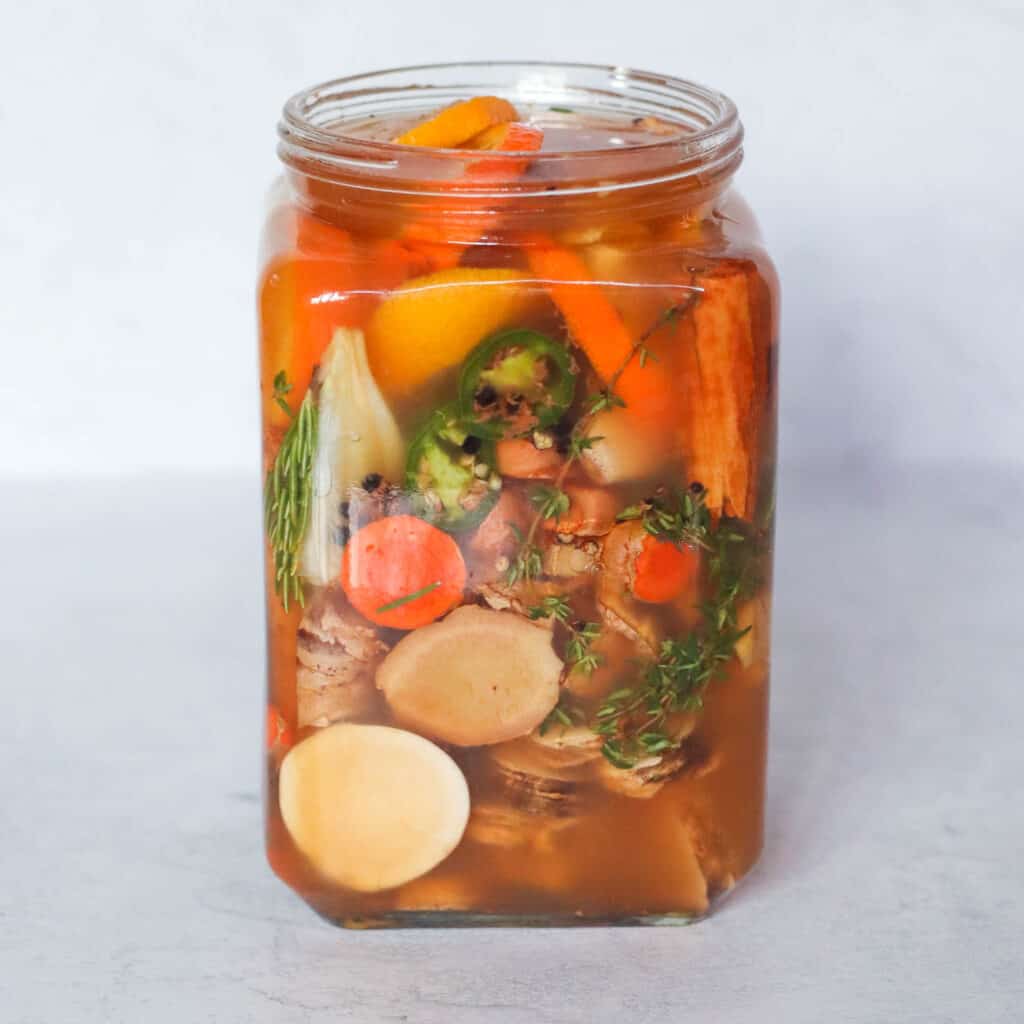
Layer Up the Goodness: In your clean glass jar, start layering the chopped onion, garlic, ginger, turmeric, horseradish, chillies, lemon, orange, rosemary, thyme, and peppercorns. If you're using any of the optional Aussie additions like lemon myrtle, or Kakadu plum, toss them in now.
Vinegar Time: Pour the apple cider vinegar over the ingredients in the jar, making sure everything is completely submerged. The vinegar acts as the solvent, drawing out all the beneficial compounds from the roots, fruits, and herbs.
Seal and Steep: Secure the lid tightly on your jar. Store the jar in a cool, dark place for at least 4 weeks, and ideally 6 weeks. This gives the vinegar plenty of time to work its magic. Give the jar a gentle shake every few days. You'll notice the colour of the vinegar changing and the aroma becoming more intense: that's a good sign!
Strain Your Elixir: After the steeping period, it's time to strain your fire cider. Line a fine mesh sieve with a few layers of cheesecloth or muslin cloth and place it over a clean bowl. Pour the contents of the jar through the sieve, squeezing the solids to extract as much liquid as possible. Compost the leftover solids: they've given all they've got!
Sweeten to Taste: Now comes the honey. This is added after steeping because raw honey's beneficial enzymes can be affected by the vinegar's acidity over a long period. Stir in raw honey, starting with a few tablespoons, and taste as you go until you reach your desired level of sweetness. Remember, the fire cider should still have a bit of a zing!
Bottle and Store: Pour your finished fire cider into dark glass bottles. Store them in a cool, dark place. Properly stored, your fire cider can last for ages: some say indefinitely!
How to Use Your Homemade Fire Cider:
A standard dose is 1-2 tablespoons a day, especially during times when you feel your immune system could use a boost. You can take it straight up (it's got a real kick!), mix it with a bit of water or juice, or even use it in salad dressings or marinades for an extra flavour punch. Some even swear by gargling with a diluted version for a sore throat (be careful, this sucker burns the inside of your nose if you do this wrong!).
Listen to your body, and adjust the amount you take as needed. It's not recommended for young children due to its potency.
Why Bother Making Your Own Fire Cider?
Besides the satisfaction of creating something yourself, homemade fire cider allows you to control the ingredients and avoid any unnecessary additives or preservatives you might find in store-bought versions. Plus, it's a fantastic way to use up bits and pieces from your garden or support local growers.
Fire Cider Warning:
Fire cider is potent! The horseradish and chillies can give it a real kick, so start with a small dose to see how you react. If you have any health concerns or are pregnant or breastfeeding, it's always best to chat with your healthcare provider before incorporating fire cider into your routine.
Making fire cider is a wonderful way to connect with traditional remedies and take a proactive step towards supporting your well-being. It’s a simple yet powerful concoction that embodies the spirit of self-sufficiency and resilience.
Join The Resilience Village:
Want to learn more about fire cider making and other homesteading skills? Join The Resilience Village online community! It’s a place to meet, connect, and grow with real people learning to create a more resilient life, one skill at a time. Share your fire cider experiments, ask questions, and learn from others’ experiences. You’ll find a supportive community ready to help you on your self-sufficiency journey. Click here to get started, it’s free.
To understand the deeper data behind why the world is changing, read my briefing in a letter to my kids.